Remote GPU Execution
Connect to remote GPUs on cloud providers or your own servers.Quick Start
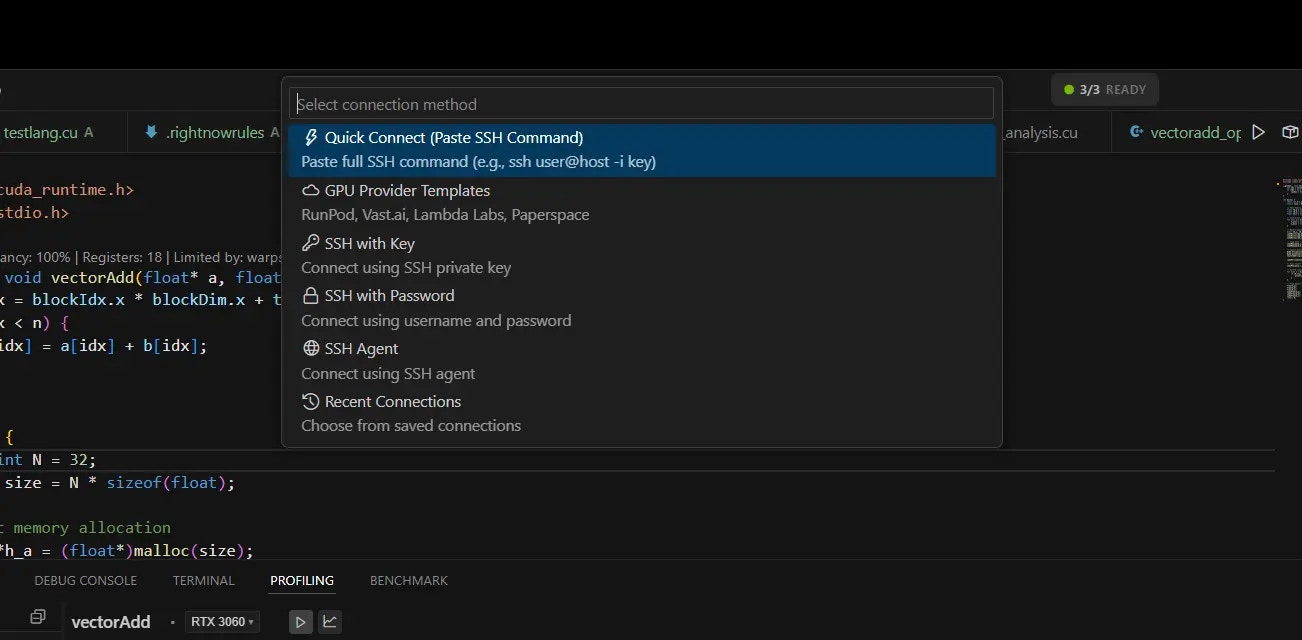
Choose Connection Type
Select one:
- Quick Connect: Paste your SSH command
- RunPod/Vast.ai/Lambda: Select your provider
- Manual Setup: Enter server details
Supported Cloud Providers
RunPod
- Copy SSH command from RunPod dashboard
- Paste in Quick Connect
- RightNow handles the rest
Vast.ai
- Get instance SSH details
- Use Quick Connect or Manual Setup
- Supports custom ports
Lambda Labs
- Use instance IP address
- Username: ubuntu
- Add your SSH key
Paperspace
- Get SSH endpoint from console
- Username: paperspace
- Connect via Manual Setup
How to Use
Open Remote Terminal
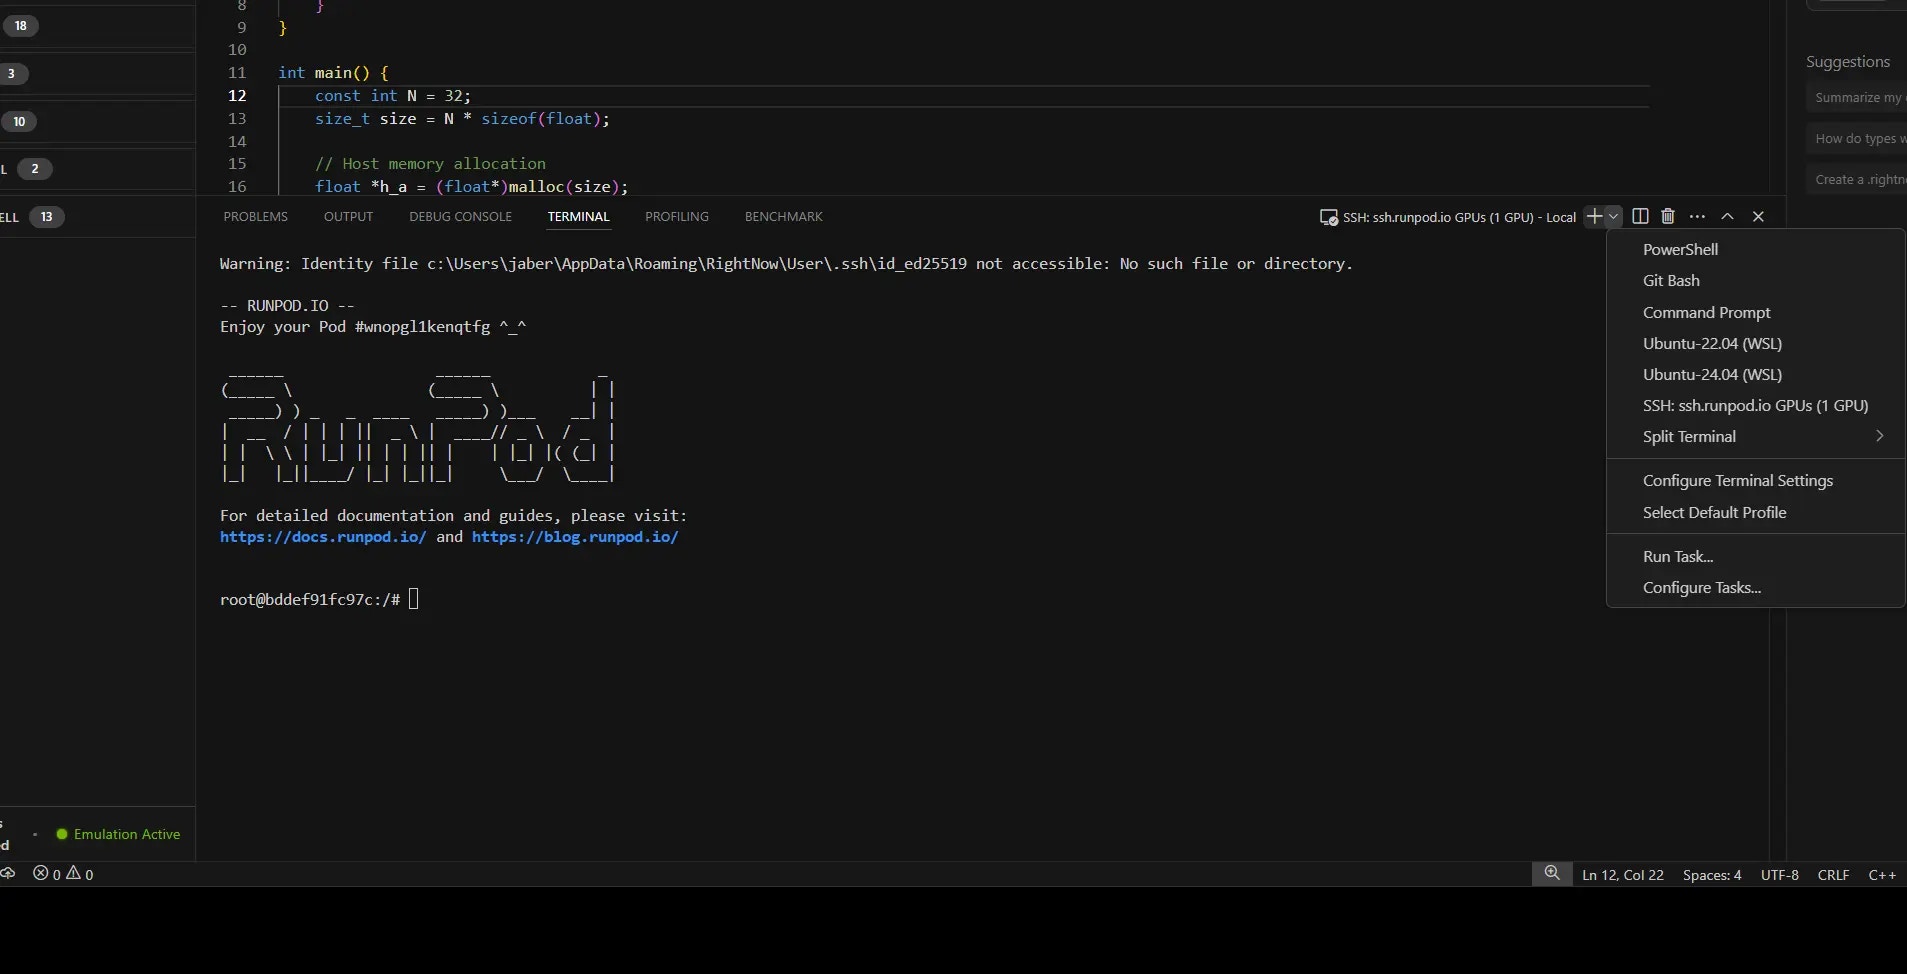
Ctrl+Shift+T to open SSH terminal to your remote GPU.
Run CUDA Code
- Open your .cu file
- Click Build button
- Code compiles and runs on remote GPU
Switch GPUs
Click GPU name in status bar to switch between local and remote.Connection Status
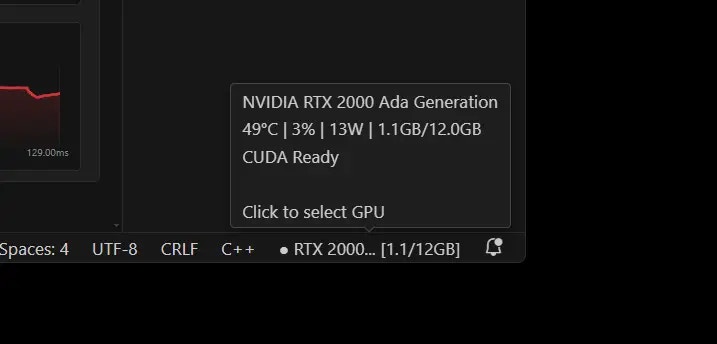
- Connected: Shows remote GPU name
- Disconnected: Shows local GPU
- Connecting: Shows progress
Tips
Best Practices
- Use SSH keys instead of passwords
- Save connections for quick access
- Check GPU availability with terminal
- Monitor GPU usage in status bar
Screenshots Needed
- Connection dialog with provider options
- Remote GPU shown in status bar
- SSH terminal to remote GPU
Next Steps
- GPU Emulation - Test without hardware
- Benchmarking - Compare performance
- Core Features - AI assistance