> ## Documentation Index
> Fetch the complete documentation index at: https://docs.rightnowai.co/llms.txt
> Use this file to discover all available pages before exploring further.
# Remote GPU Execution
> Run CUDA code on remote GPUs through SSH.
# Remote GPU Execution
Connect to remote GPUs on cloud providers or your own servers.
## Quick Start
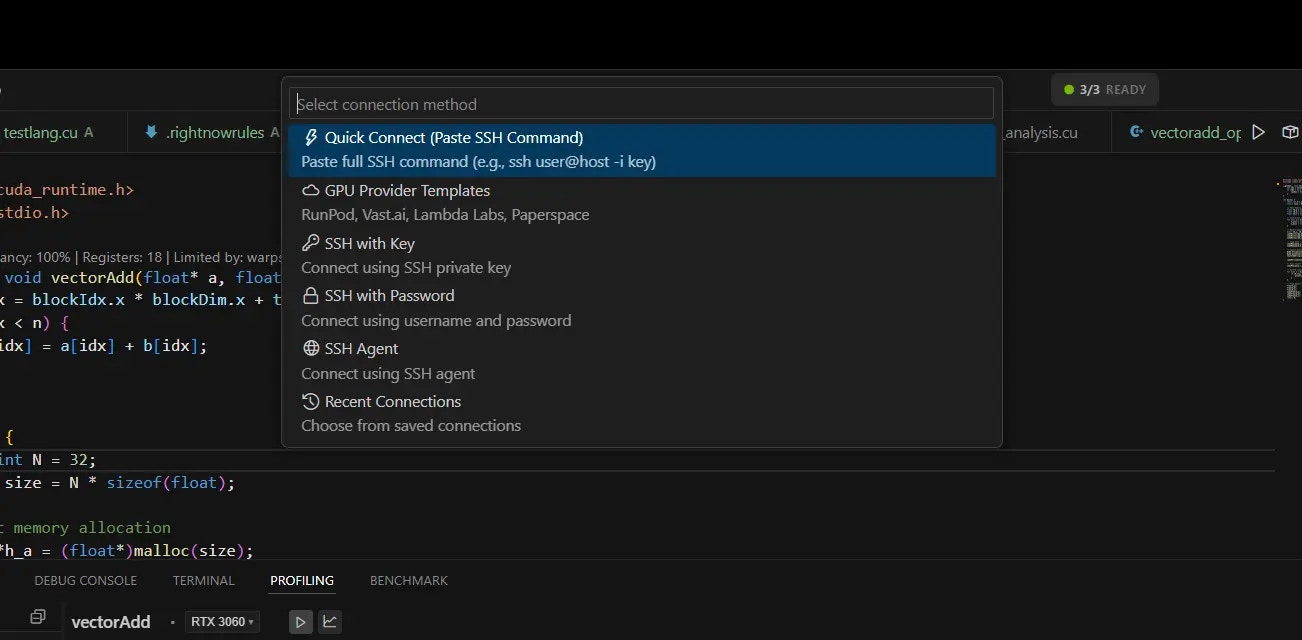 Press `Ctrl+Shift+G` or click "Remote GPU: Connect" in command palette.
Select one:
* **Quick Connect**: Paste your SSH command
* **RunPod/Vast.ai/Lambda**: Select your provider
* **Manual Setup**: Enter server details
Provide your SSH details:
* Host/IP address
* Username
* SSH key or password
Once connected, your code runs on the remote GPU automatically.
## Supported Cloud Providers
### RunPod
* Copy SSH command from RunPod dashboard
* Paste in Quick Connect
* RightNow handles the rest
### Vast.ai
* Get instance SSH details
* Use Quick Connect or Manual Setup
* Supports custom ports
### Lambda Labs
* Use instance IP address
* Username: ubuntu
* Add your SSH key
### Paperspace
* Get SSH endpoint from console
* Username: paperspace
* Connect via Manual Setup
## How to Use
### Open Remote Terminal
Press `Ctrl+Shift+G` or click "Remote GPU: Connect" in command palette.
Select one:
* **Quick Connect**: Paste your SSH command
* **RunPod/Vast.ai/Lambda**: Select your provider
* **Manual Setup**: Enter server details
Provide your SSH details:
* Host/IP address
* Username
* SSH key or password
Once connected, your code runs on the remote GPU automatically.
## Supported Cloud Providers
### RunPod
* Copy SSH command from RunPod dashboard
* Paste in Quick Connect
* RightNow handles the rest
### Vast.ai
* Get instance SSH details
* Use Quick Connect or Manual Setup
* Supports custom ports
### Lambda Labs
* Use instance IP address
* Username: ubuntu
* Add your SSH key
### Paperspace
* Get SSH endpoint from console
* Username: paperspace
* Connect via Manual Setup
## How to Use
### Open Remote Terminal
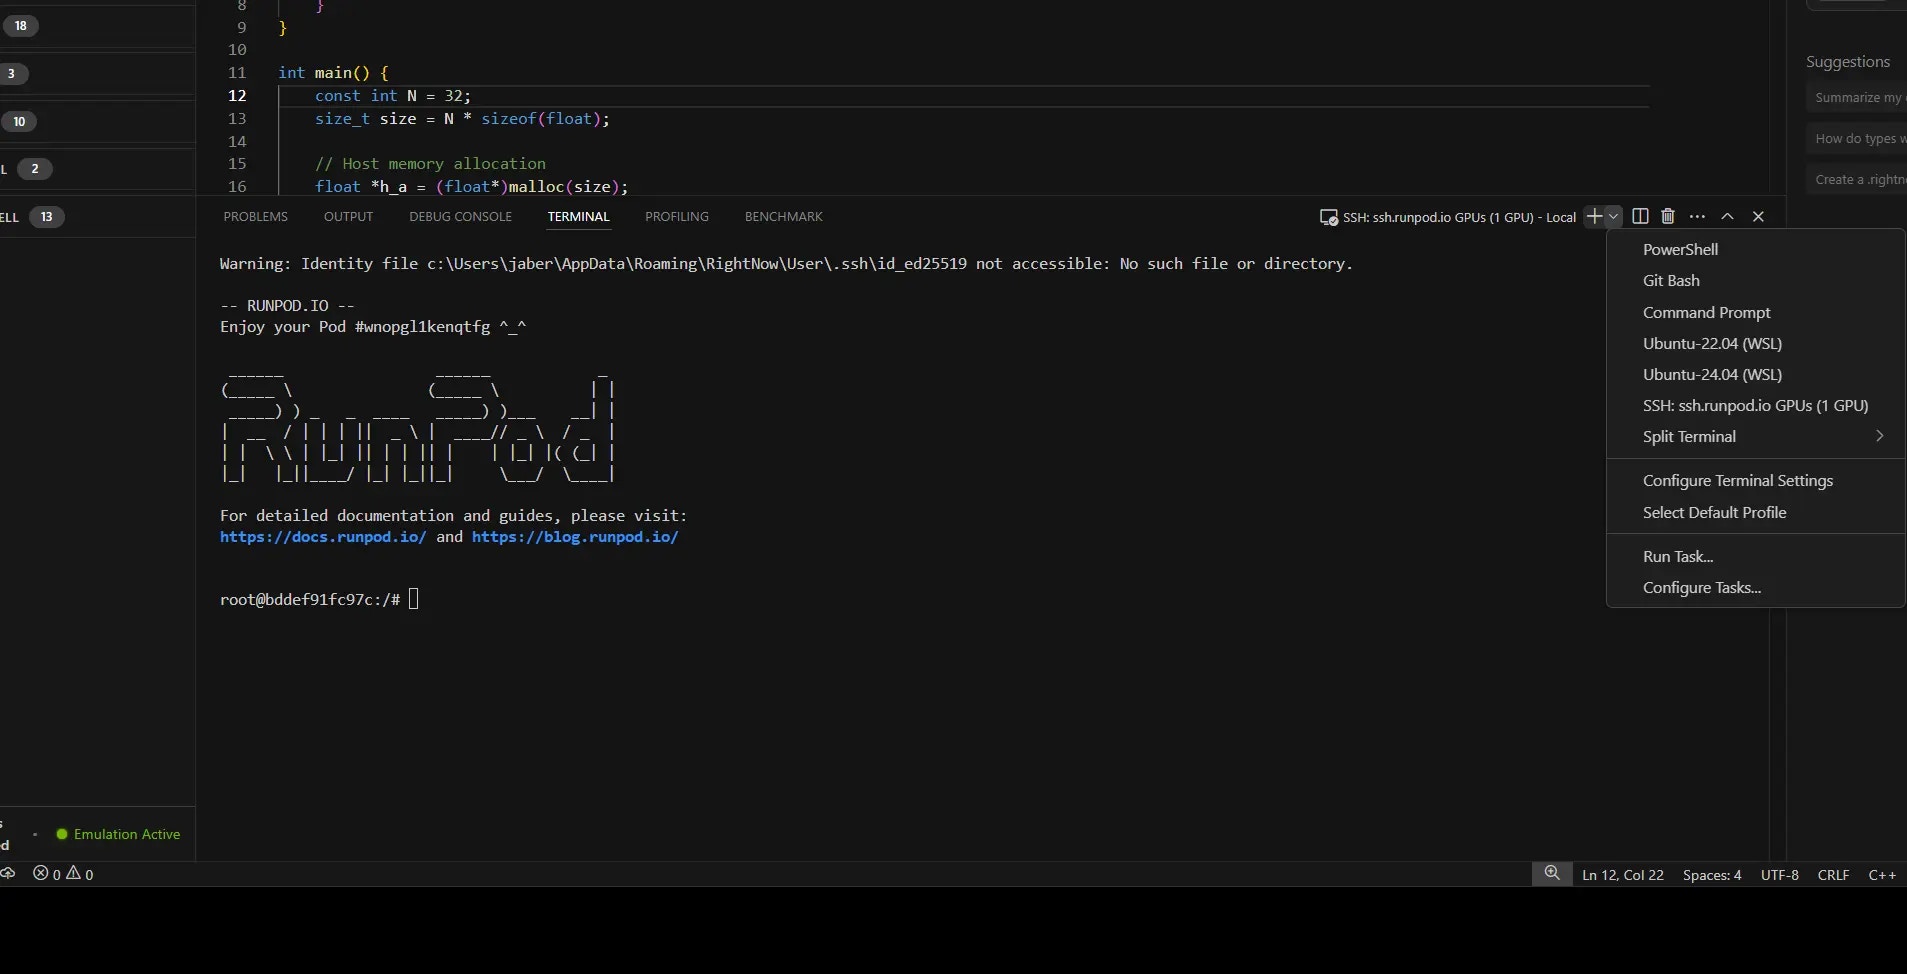 Press `Ctrl+Shift+T` to open SSH terminal to your remote GPU.
### Run CUDA Code
1. Open your .cu file
2. Click Build button
3. Code compiles and runs on remote GPU
### Switch GPUs
Click GPU name in status bar to switch between local and remote.
## Connection Status
Press `Ctrl+Shift+T` to open SSH terminal to your remote GPU.
### Run CUDA Code
1. Open your .cu file
2. Click Build button
3. Code compiles and runs on remote GPU
### Switch GPUs
Click GPU name in status bar to switch between local and remote.
## Connection Status
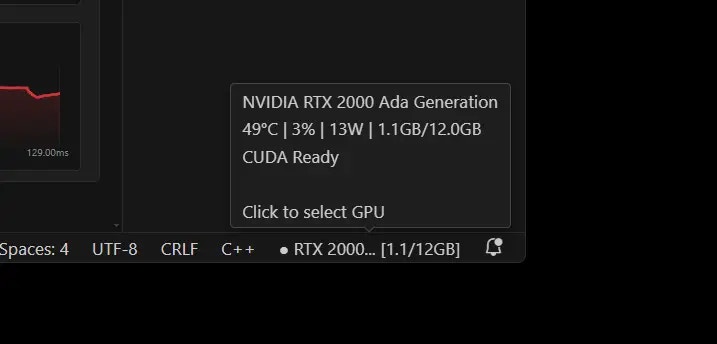 Look at the status bar:
* **Connected**: Shows remote GPU name
* **Disconnected**: Shows local GPU
* **Connecting**: Shows progress
## Tips
**Best Practices**
* Use SSH keys instead of passwords
* Save connections for quick access
* Check GPU availability with terminal
* Monitor GPU usage in status bar
**Troubleshooting**
* Can't connect? Check firewall and SSH settings
* GPU not detected? Run `nvidia-smi` in terminal
* Slow connection? Check network speed
## Screenshots Needed
1. Connection dialog with provider options
2. Remote GPU shown in status bar
3. SSH terminal to remote GPU
## Next Steps
* [GPU Emulation](/gpu-emulation) - Test without hardware
* [Benchmarking](/benchmarking) - Compare performance
* [Core Features](/core-features) - AI assistance
Look at the status bar:
* **Connected**: Shows remote GPU name
* **Disconnected**: Shows local GPU
* **Connecting**: Shows progress
## Tips
**Best Practices**
* Use SSH keys instead of passwords
* Save connections for quick access
* Check GPU availability with terminal
* Monitor GPU usage in status bar
**Troubleshooting**
* Can't connect? Check firewall and SSH settings
* GPU not detected? Run `nvidia-smi` in terminal
* Slow connection? Check network speed
## Screenshots Needed
1. Connection dialog with provider options
2. Remote GPU shown in status bar
3. SSH terminal to remote GPU
## Next Steps
* [GPU Emulation](/gpu-emulation) - Test without hardware
* [Benchmarking](/benchmarking) - Compare performance
* [Core Features](/core-features) - AI assistance